Meraki Okta Setup

Set up Okta SSO with Meraki and multiple SAML roles
I wanted to quickly write a post about how we used Okta internally to set up Cisco Meraki SSO, because in our use case, none of the documentation I could find actually worked the way we wanted to use this. It seems like it should be a pretty common use case, at least for MSPs, so I wanted to write up the details on how we got it to work.
First, a little bit of background. We are a Managed Service Provider (MSP), so we help fully manage several customers IT infrastructure, including their Cisco Meraki networks, which is our preferred vendor to work with. We also have different roles within our org, which need different levels of access when we log in to our networking equipment.
Many Single Sign On (SSO) integrations essentially match up your username, typically an email, to a user that is in the system, and then that username is assigned roles (like super admin, partial admin, or read only, etc.) either directly or through a group that they are in. More advanced implementations can actually provision new users or groups on the fly from the SSO provider, such as Okta. Cisco Meraki does not do it this way, in fact SSO will not work correctly if your username conflicts with a username that is already in the Cisco Meraki dashboard. Instead, you set up roles as a user attribute which gets passed along in the SSO request, and then grants the access to the user based on that role that is passed through.
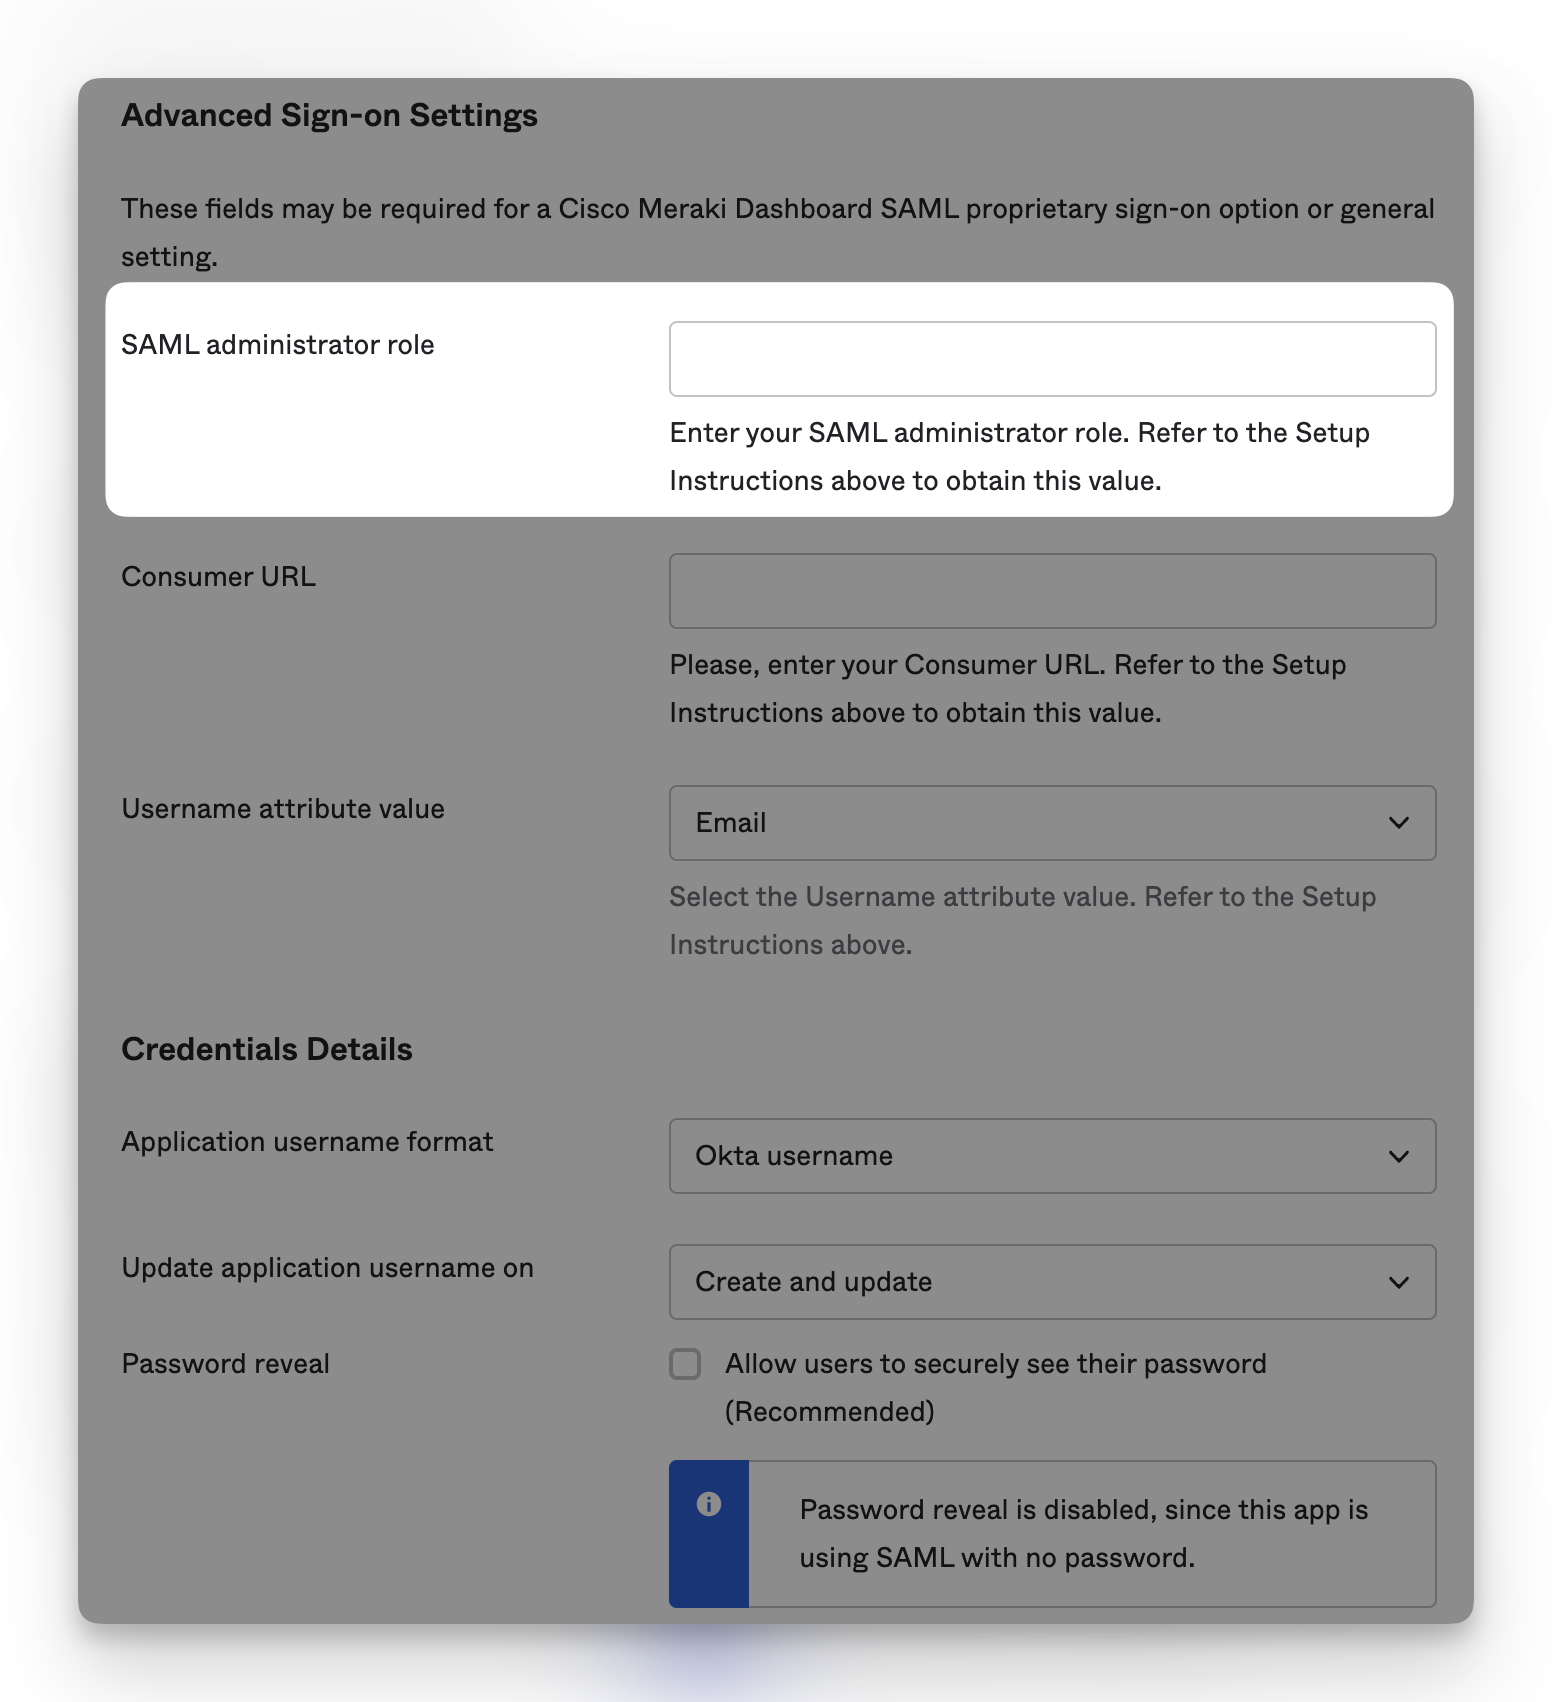
If you only have one role in your organization, this is pretty easy to set up in Okta. You can use the pre-built Cisco Meraki Okta app, and follow the instructions provided by Okta. During the setup process, Okta provides a specific field called SAML administrator role. Simply put your SAML role that you set up in the Meraki dashboard, along with the other necessary information, and you’re good to go in a few minutes.

But what if you have different users that need different roles? We needed this, and I also didn’t want to have a conflict for users that have regular accounts in Cisco Meraki dashboard. We have a couple of users that need to use the Cisco Meraki API, which you can only generate with a regular user account, and not a SAML SSO login. You certainly could create new accounts that use email aliases or something like that, then have the SSO pass through the primary email and it would work fine, but ideally I didn’t want to have any conflicts and didn’t really want to re-do our regular accounts and API keys, etc.
So rather than using the built in Okta Cisco Meraki application, I decided to just create a custom SAML app, and see if I could get it working that way. I will assume for the sake of this post that you already know how to create a custom SAML app in Okta.
First, I created a custom profile attribute in the Okta directory where I can store the SAML role that I want to assign to specific users. I called the attribute Meraki Administrator Role with a variable name of adminRole.
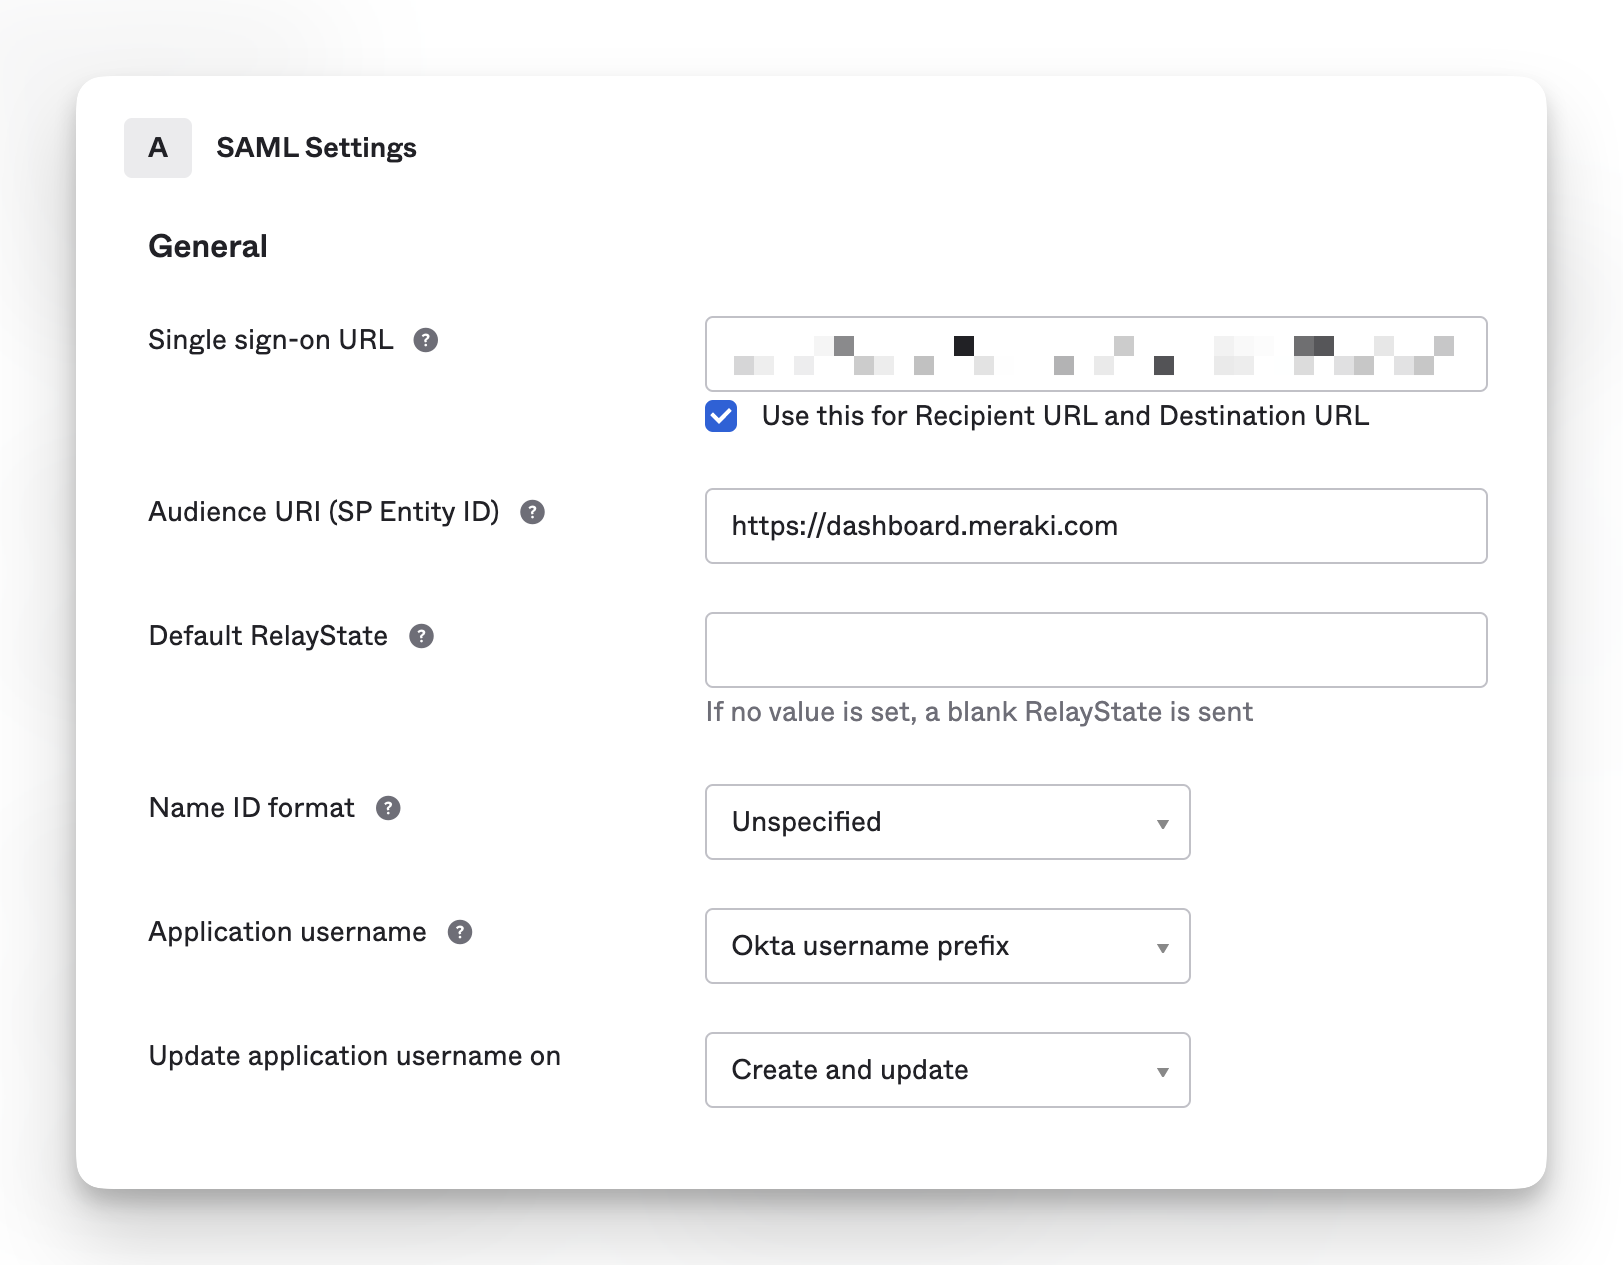
In the first section, I added the SSO URL and Audience URI (you can follow Cisco Meraki’s documentation on these), but rather than passing email through as the Application Username, like the pre-built app integration does, I pass through the Okta Username prefix, which solves the conflict issue.

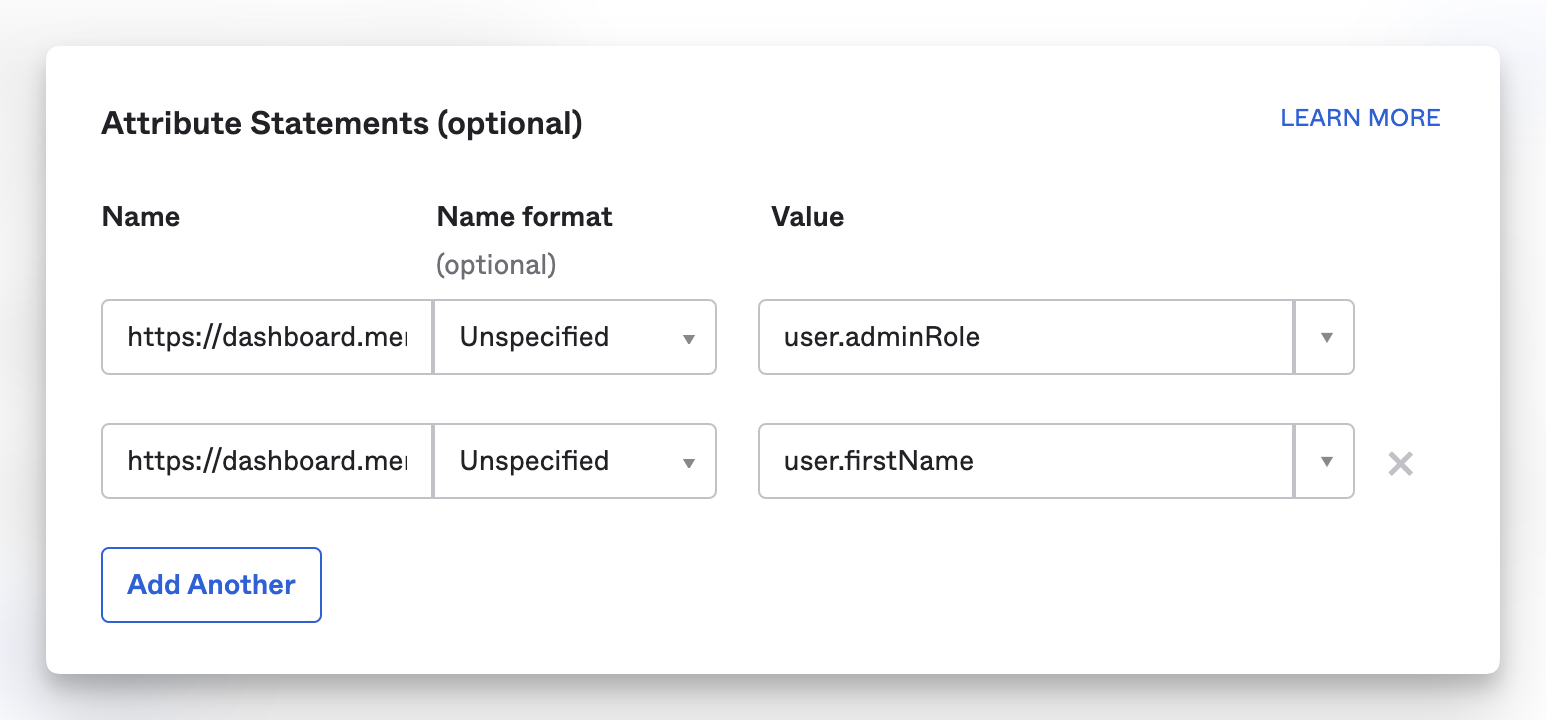
Next, under the Attribute Statements (Optional), I added the following fields to match up with what Cisco Meraki is expecting in a SAML request.
Name -
https://dashboard.meraki.com/saml/attributes/roleName Format -
UnspecifiedValue - (the adminRole is coming from the custom profile attribute from above)
user.adminRoleAnd a second Attribute Statement with
Name -
https://dashboard.meraki.com/saml/attributes/usernameName Format -
UnspecifiedValue -
user.firstName
With this all set, I added the SAML role from the Meraki dashboard that we set up to everyone’s user profile, assigned the app, and it worked great!

